Friday I’m in Love

Happy Friday!!

This week has been the first week since the holidays, that it feels like we are back on a somewhat predictable schedule. Naps are back in full force, bedtime routines are kept to a manageable time frame, everyone is sleeping through the night and life is good!

So let’s get this Friday love going!

~one~

IMG_2113

Ahhh….Dunkin’ Donuts, oh how I’ve missed you! Since I started my half marathon training, I have really been focusing on what I eat. I’ve also started saying to myself before I eat, “will this fuel my body?” and that has helped me to continue to make healthy choices. Except for Monday morning…I wanted and needed a donut. It had been 8 weeks for goodness sake! Oh, Toasted Coconut it had been way too long!  You will always will be my favorite. I LOVE you!!

~two~

IMG_2111

My baby girl, Charlotte. Although, these days she seems more like a kid than a 3 year old. She started ballet last year when her older sister decided to stop. The studio let Charlotte (then only 2.5 years old) take Madeline’s place. Charlotte did wonderful! And she loved it. At first, I thought she only loved it because she was doing something that her older sister did but that’s not the case.

In May, when classes were over for the season, I didn’t enroll her again. We weren’t living close to that studio anymore and I really wasn’t sure if she loved it or not. A few weeks into the summer she asked me why she didn’t do ballet anymore. I answered her question with a question…”Do you like ballet?” My love responds with, “Oh momma, I love to twirl and leap!” And yes she does! She leaps and twirls allllll over the house, the yard, the driveway, at school, in the parking lot, at Publix, at Target…

Needless to say, I did sign her up for another season and on Monday, I was finally able to capture my baby girl doing what she loves…leaping! Watching her do something she loves with a huge smile on her face, makes this momma’s heart skip a beat.

I love you Charlotte Anne!

~three~

IMG_2135

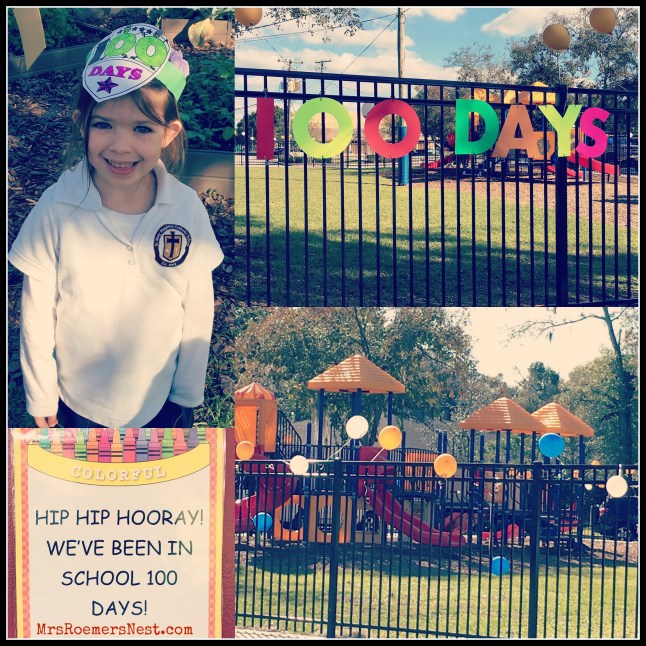
Eeeek!! My girl has hit the 100 day mark in kindergarten! I just can’t believe it. There were some days that I didn’t know if we were coming or going. It was a HUGE adjustment going from VPK to kindergarten…for both of us!

I’m so proud of my girl and everything she has accomplished in these past 100 days. Her heart is so full of love and compassion and she continues to amaze me every single day.

I love you Madeline Kate!

~four~

12645172_10206073964584299_6838777757268272752_n

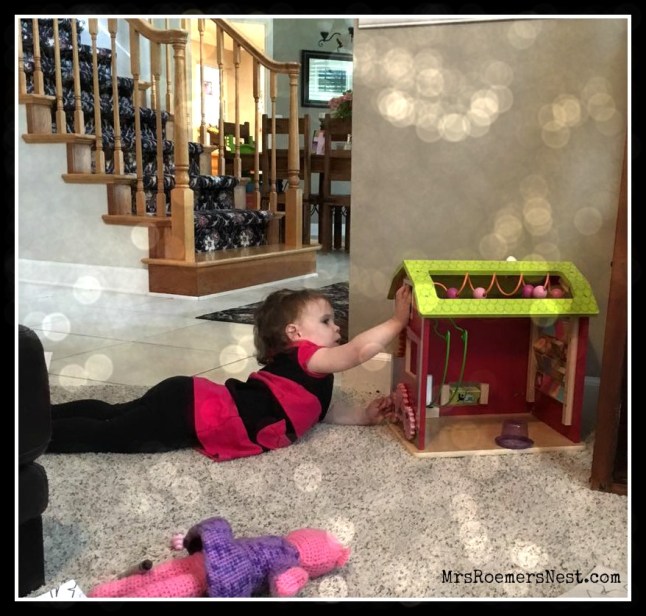
Oh Elizabeth! We have been together every single day since the day you were born…almost 20 months ago. Your days get jammed with to do lists, errands, sitting in car line and fighting your sisters for my attention usually all while perched on my left hip. I loved it this week when you played…on the floor…All. By. Yourself. You are following in your sisters footsteps and starting to grow into your independence. Hallelujah!

I love you Elizabeth Jane!

~five~

12573198_10206073964384294_2030878232432385767_n

And last but not least…An amazing smelling candle for 50% off at Publix, an amazing speed workout that included 8:26, 8:45 & 8:40 mile splits, and a new favorite red wine from Quantum Leap WineryKaley’s Rescue Red. This was the perfect way to relax at the end of a crazy day!

What are you in love with this week?

Advertisement

DIY No Sew Kids Indian Costume

My kindergartener is having a Thanksgiving Day Feast with the 1st and 2nd graders next week and they can come dressed up as either an Indian or a Pilgrim. My girl wants to be an Indian but I’m not allowed to braid her hair. WHAT?!?! I’m going to have to work on that one…

I searched Pinterest and found what appears to be an ‘easy’ no sew do-it-yourself indian dress. I pinned it and headed out to the stores. Well, truth be told…I headed to my husband’s closet first to see if I could steal an old brown t-shirt or two. No such luck. **Note to self…buy him a variety of colored shirts, not just orange and blue 😉

I headed to Hobby Lobby first and they had a great selection of long sleeve t-shirts at a great price…and they were on sale too! Score! But…they didn’t have brown. And I really, really wanted brown. Ok, no biggie. I’ll just dye the shirts. Easy peasy. But…they didn’t have brown dye. They were all out. Ok, no biggie. I’ll stop at Michael’s on my way home.

IMG_0389-0

While at Hobby Lobby, I picked up two (I only need one costume but I have a feeling my 3 year old will want one) long sleeved, size small adult t-shirts, 2 packs of feathers, and 1 piece of brown foam board (maybe to help in making a headband??). I already had beads at home left over from another project. So off to Michael’s for some brown dye…I was also hoping they had brown shirts so I could save a step but they didn’t.

They had brown dye and I was able to use a 50% off coupon so it came to $2.13! Score! Now…let’s change the color of these shirts because I promised the big kids they could help put beads on when they got home from school.

IMG_0390-0

I took a bucket from the garage (thank goodness it’s black), rinsed it out and filled it with HOT water. I dumped the liquid dye in and mixed for about 2 minutes before I put the wet shirts in the bucket. The directions say to add 1 cup of salt but I didn’t. I’m not looking for a perfectly brown shirt. I just need it not to be white and to be kind of brown.

Now, the directions say to mix CONSTANTLY for 30-60 minutes. Umm…who the heck has time for that?! And I’m pretty sure my arm would fall off in the process. So I left it and mixed it maybe every 5 minutes for about 30 minutes.

IMG_0391-0

After thirty minutes, I very carefully emptied the bucket and started to rinse the shirts with cool water. Talk about a mess! Thank goodness the big kids were at school and the baby was sleeping because this was hard enough to do by myself let alone have my little helpers helping me.

This is what the shirt looked like after I rinsed it with cool water. I tried my best to keep rinsing until the water was clear but I probably could have done a little bit better. Next up, I threw them in the washer and dryer!

IMG_0392-0

This is how it looked after the washer…

IMG_0394-0

And this is how it looked after the dryer…

IMG_0396

Definitely a bit blotchy but it will be perfect for an indian costume! Next up, time for the scissors and some beads!

Stayed tuned…

{insert Jeopardy music here}

For Part 2, click here!

Change the look of your kitchen with just a little paint!

It’s no exaggeration to say that I spend ALOT of time in my kitchen. I’m a stay at home mom with 3 kids, 4 if you count the husband, and they require to be fed on a routine basis….like every 10minutes, no lie!

When we were house hunting, finding the perfect house with the perfect kitchen was a bit on the impossible side. I almost nixed the idea of putting an offer on the house we are currently living in because I HATED the kitchen. I hated everything about it…

the old cabinets

12068793_10205478251211837_740312369532450690_o

the white appliances

12080115_10205478250731825_45452712721341590_o

the cream color formica counter tops

12087866_10205478248891779_7030794072462890708_o

the light colored tile, the red paint, the gold sponge paint on top of the red paint and the painted on faux brick on top of the red paint.

12140113_10205478249651798_2512257362568208035_o

Don’t get me wrong, I LOVE the color red. I really do. But it was too much for the kitchen. It wasn’t my style and it made me not want to be in the kitchen.

I firmly believe that the most memorable family memories are made in the kitchen. Any conversation or story that I tell my kids from my childhood, always has us in the kitchen. So I was determined to turn this kitchen around.

I pinned, I googled and I browsed Home Depot. I knew what I wanted but I couldn’t get the husband (or the checkbook) to go for it, no matter how hard I tried. Deep down, I knew it was unrealistic to redo the entire kitchen so I opted to work with what I had. I still pinned and googled but this time I added a few key terms to help with my search…oak cabinets, white formica, white appliances. I wanted the internet to show me what color paint would work best with what I had because I knew I could get the husband on board with that and he would love it too! I could change the look without draining the bank account. I was determined to LOVE my kitchen again and a little paint could bring me that love…right??

Stayed tuned for Part II…

Taking A Chance

924eaaa774247674334d82ef5e428630(image found on Pinterest)

I was scrolling through pics on Instagram, and stopped when I came across Orlando Moms Blog post. They were looking for new blog contributors. What? Seriously? The post said they wanted local moms who “inspire, encourage, support, inform and simply share this journey of motherhood we’re all navigating together.” I paused, caught my breath and said, “This is the perfect job for me.”

And in the very next thought, all the negative, self destructive thoughts came flooding in. They would never pick you. You aren’t a writer. When would I find time to do this, IF they even picked me. What could I actually contribute??

I shut that voice up and went to sleep. The next morning on my run, it was all I could think of. This was meant for me. I knew. I felt it. But could I actually get the nerve up to apply for it?? That was the million dollar question.

I only had a few days until the deadline to submit the application. I knew that if I let this opportunity pass, I would be more upset than if I applied and didn’t get the job. So…I shoved all those insecurities in a box, duct taped it closed and answered those questions. All that was left to do was hit ‘Submit.’

{Insert Jeopardy music here…..}

It took a while…maybe a few hours. It wasn’t until my sister pretty much yelled at me through text that I went running to the computer, pulled up the application and sent it in.

HOLY CRAP! What did I just do??

A few weeks went by and I hadn’t heard anything. I just assumed the new contributors were chosen and I didn’t receive my “Sorry, try again next time” email. And I was okay with that. I was glad that I took the chance. I didn’t have any regrets.

I was feeding the baby in the car, waiting for the big kids to finish school and I happened to check my email. Low and behold, there it was. I received an email from Orlando Moms Blog but it was asking me to join the team!!! I freaked out. I cried. I was shaking. I couldn’t believe it. I still can’t believe it.

My first post for Orlando Moms Blog,”Stock Your Freezer. It will save your sanity. I promise” went live this morning. In it, I give a bunch of simple freezer cooking tips to help make the endless task of feeding the family a bit easier. It saved my sanity and it can save your. Promise.

Stock-your-freezer

Happy Cooking!

xoxo

Weekly Meal Plan

Meal Plan for the week of March 16-20:

simple-meal-planning-200200-1

Crock Pot BBQ Meatballs (freaking LOVE these!)

Slow Cooker Corned Beef & Cabbage

One Pan Lemon Garlic Chicken Pasta (**new recipe for me)

Tilapia w Garlic Roasted Tomatoes & Corn (already made a few weeks ago, just have to remember to defrost it this time!)

Who else is cooking Corned Beef on Tuesday? How do you like to cook it? I’ve only ever done it in the crock pot and it always turns out delicious! Yummmm!

I’ll be sure to take lots of pictures especially of the new recipe I’m trying out.

Happy Cooking!

P.S. Would you be interested in a shopping list if I added it along with the meal plan? It’s easy to do. Just let me know, I would be happy to include it!

Lasagna Soup? What?!

A few weeks ago, my sister told me that she made Lasagna Soup. I was like, lasagna soup?? What?!? How in the world can lasagna be made into soup?! She went on and on about how much the WHOLE family loved it…even the kids. Well, once she said the kids loved it I knew I had to give it a try.

20150211-173840.jpg

Skinnytaste‘s recipes are absolutely, without a doubt, DELICIOUS! So much so, that I even bought her cookbook last year! I should have bought some kind of protector for it to keep it clean from all my cooking though…

20150211-173922.jpg

I’m not usually looking to reduce calories so I always find myself making the dishes “un-skinny”. With this one, I used regular sausage and most definitely added more cheese.

The girls didn’t try it because I ended up feeding them before it was done. I had a MNO to go to and I wasn’t feeling up to having them try something new. That takes a whole lot of energy…and time. Both of which I was lacking that night.

Next time, I will have them help me prepare and eat this meal. I just know they will LOVE breaking the lasagna noodles as much as I did. It was a great stress reliever!

Happy Cooking!!

Katie 🙂

Cook Once, Eat Twice

The husband and I both love freshly cooked meals. Well honestly, who doesn’t?! But let’s face it, with three kids 4 and under that’s just not going to happen very often. Unless…he hires me a live-in chef. And I’m pretty sure that will NEVER happen! Ha!

photo

If you are new to meal planning or freezing meals, you MUST try out this recipe. It’s super easy to prepare and if you are making one, why not make a second and freeze it for another week.

Crock Pot Mongolian Beef from Once A Month Meals.

20150210-140702.jpg

I’ve tested this one on the hubby before and he had NO CLUE that it was previously frozen. After he was done, I asked him how it was and he said it was delicious!! I chuckled and said…that’s great because I made it last month. From that little “experiment,” he now loves freezer meals too! Thank goodness!

Today, I used a 10oz bag of already shredded carrots (a HUGE time saver!) and ginger paste instead of fresh ginger. This is my first time using the ginger paste so I used the same measurement as the recipe. I’ll find out tonight if I need to increase it next time or not. Promise to keep ya posted!

Happy Tuesday!

Katie 🙂

Crafty Kid Time

Sunday’s card making went so well, I stopped at Michael’s again and picked up some more supplies. I’m in the process of making some teacher gifts (another blog post to follow) and I needed some cards to go with the gifts. My 4yr old LOVES to craft and she is in LOVE with Baby Jesus (she thinks she will get to meet the “real” Baby Jesus on Christmas) so I thought this would be a perfect craft for her. I waited until the other girls went down for their nap and I let her do this one alone. She let me help every once in a while, but for the most part she did it all.

photo 3-2

Now these were slighter more expensive to make…$0.32 per card compared to $0.30 per card for the Christmas tree one. Hahaha! Again, it would cost more to mail these cards than it is to make them. LOVE IT!!

Here’s the breakdown…

  • cards with envelopes…$2.49
  • nativity scene foam stickers…$1.99

For a grand total of $4.48. The stickers only had a complete set of 7, so we decided to do two different cards to be able to get 14 cards. It took a bit to convince her that it would be ok if the wise men are on their own card. I told her they will follow the bright star of Bethlehem and find Baby Jesus. She gave that some serious thought and then gave me the nod of approval. Have I mentioned that I just love this age?

I now have a total of 39 Christmas cards and I only spent about $12. The kids had a blast creating cards to give out to friends and family and hopefully I’ve created some good family memories for them.

Love & Prayers,

Katie

Easy Peasy, Lemon Squeezy

The girls and I had a blast teaching at our church’s Kids Mass Ministry on Sunday and I wanted to take them out afterward for a surprise. We love to do crafts of all kinds and when I turned into the Michael’s parking lot, they went NUTS!

I didn’t have a craft in mind and I didn’t have a list, which is so not like me. We just went to “look”. Haha! (Yeah, right…liar, liar, pants on fire!)

Everything was on sale!! We were like kids in a candy store! I needed something easy, something that both of the big kids could do and have fun with and considering I didn’t get to send out Christmas cards yet, why not have them make some. I told them my plan and we were on the hunt for the perfect supplies to make our cards.

IMG_2686

These foam stickers are the bomb diggity. Both of the girls (ages 2 & 4) have no trouble whatsoever peeling the paper and sticking them on the cards. I ended up buying Christmas tree embellishments and not stickers but it worked out fine. Any reason to bring out the Elmer’s glue is another cause for celebration in the Roemer house! I glued the trees, Charlotte placed the stars on top and Madeline ever so perfectly placed the presents under the tree. It took us about 45 minutes to complete those cards. There was not one fight, one disagreement or any whining or crying. Heaven!

Here’s the breakdown in cost per card…

  • 24cards w envelopes….$2.49
  • tree stickers…$1.99
  • star stickers…$1.99
  • present stickers…$1.19

For a grand total of $7.66 which comes out to $0.30 per card! It’s going to be more expensive to mail these cards than it was to make them.

Easy Peasy, Lemon Squeezy!!

So head on out to your local arts & crafts store, pick up some supplies and have a craft filled afternoon with the kiddos!

Love & Prayers,

Katie