Change the look of your kitchen with just a little paint!

It’s no exaggeration to say that I spend ALOT of time in my kitchen. I’m a stay at home mom with 3 kids, 4 if you count the husband, and they require to be fed on a routine basis….like every 10minutes, no lie!

When we were house hunting, finding the perfect house with the perfect kitchen was a bit on the impossible side. I almost nixed the idea of putting an offer on the house we are currently living in because I HATED the kitchen. I hated everything about it…

the old cabinets

12068793_10205478251211837_740312369532450690_o

the white appliances

12080115_10205478250731825_45452712721341590_o

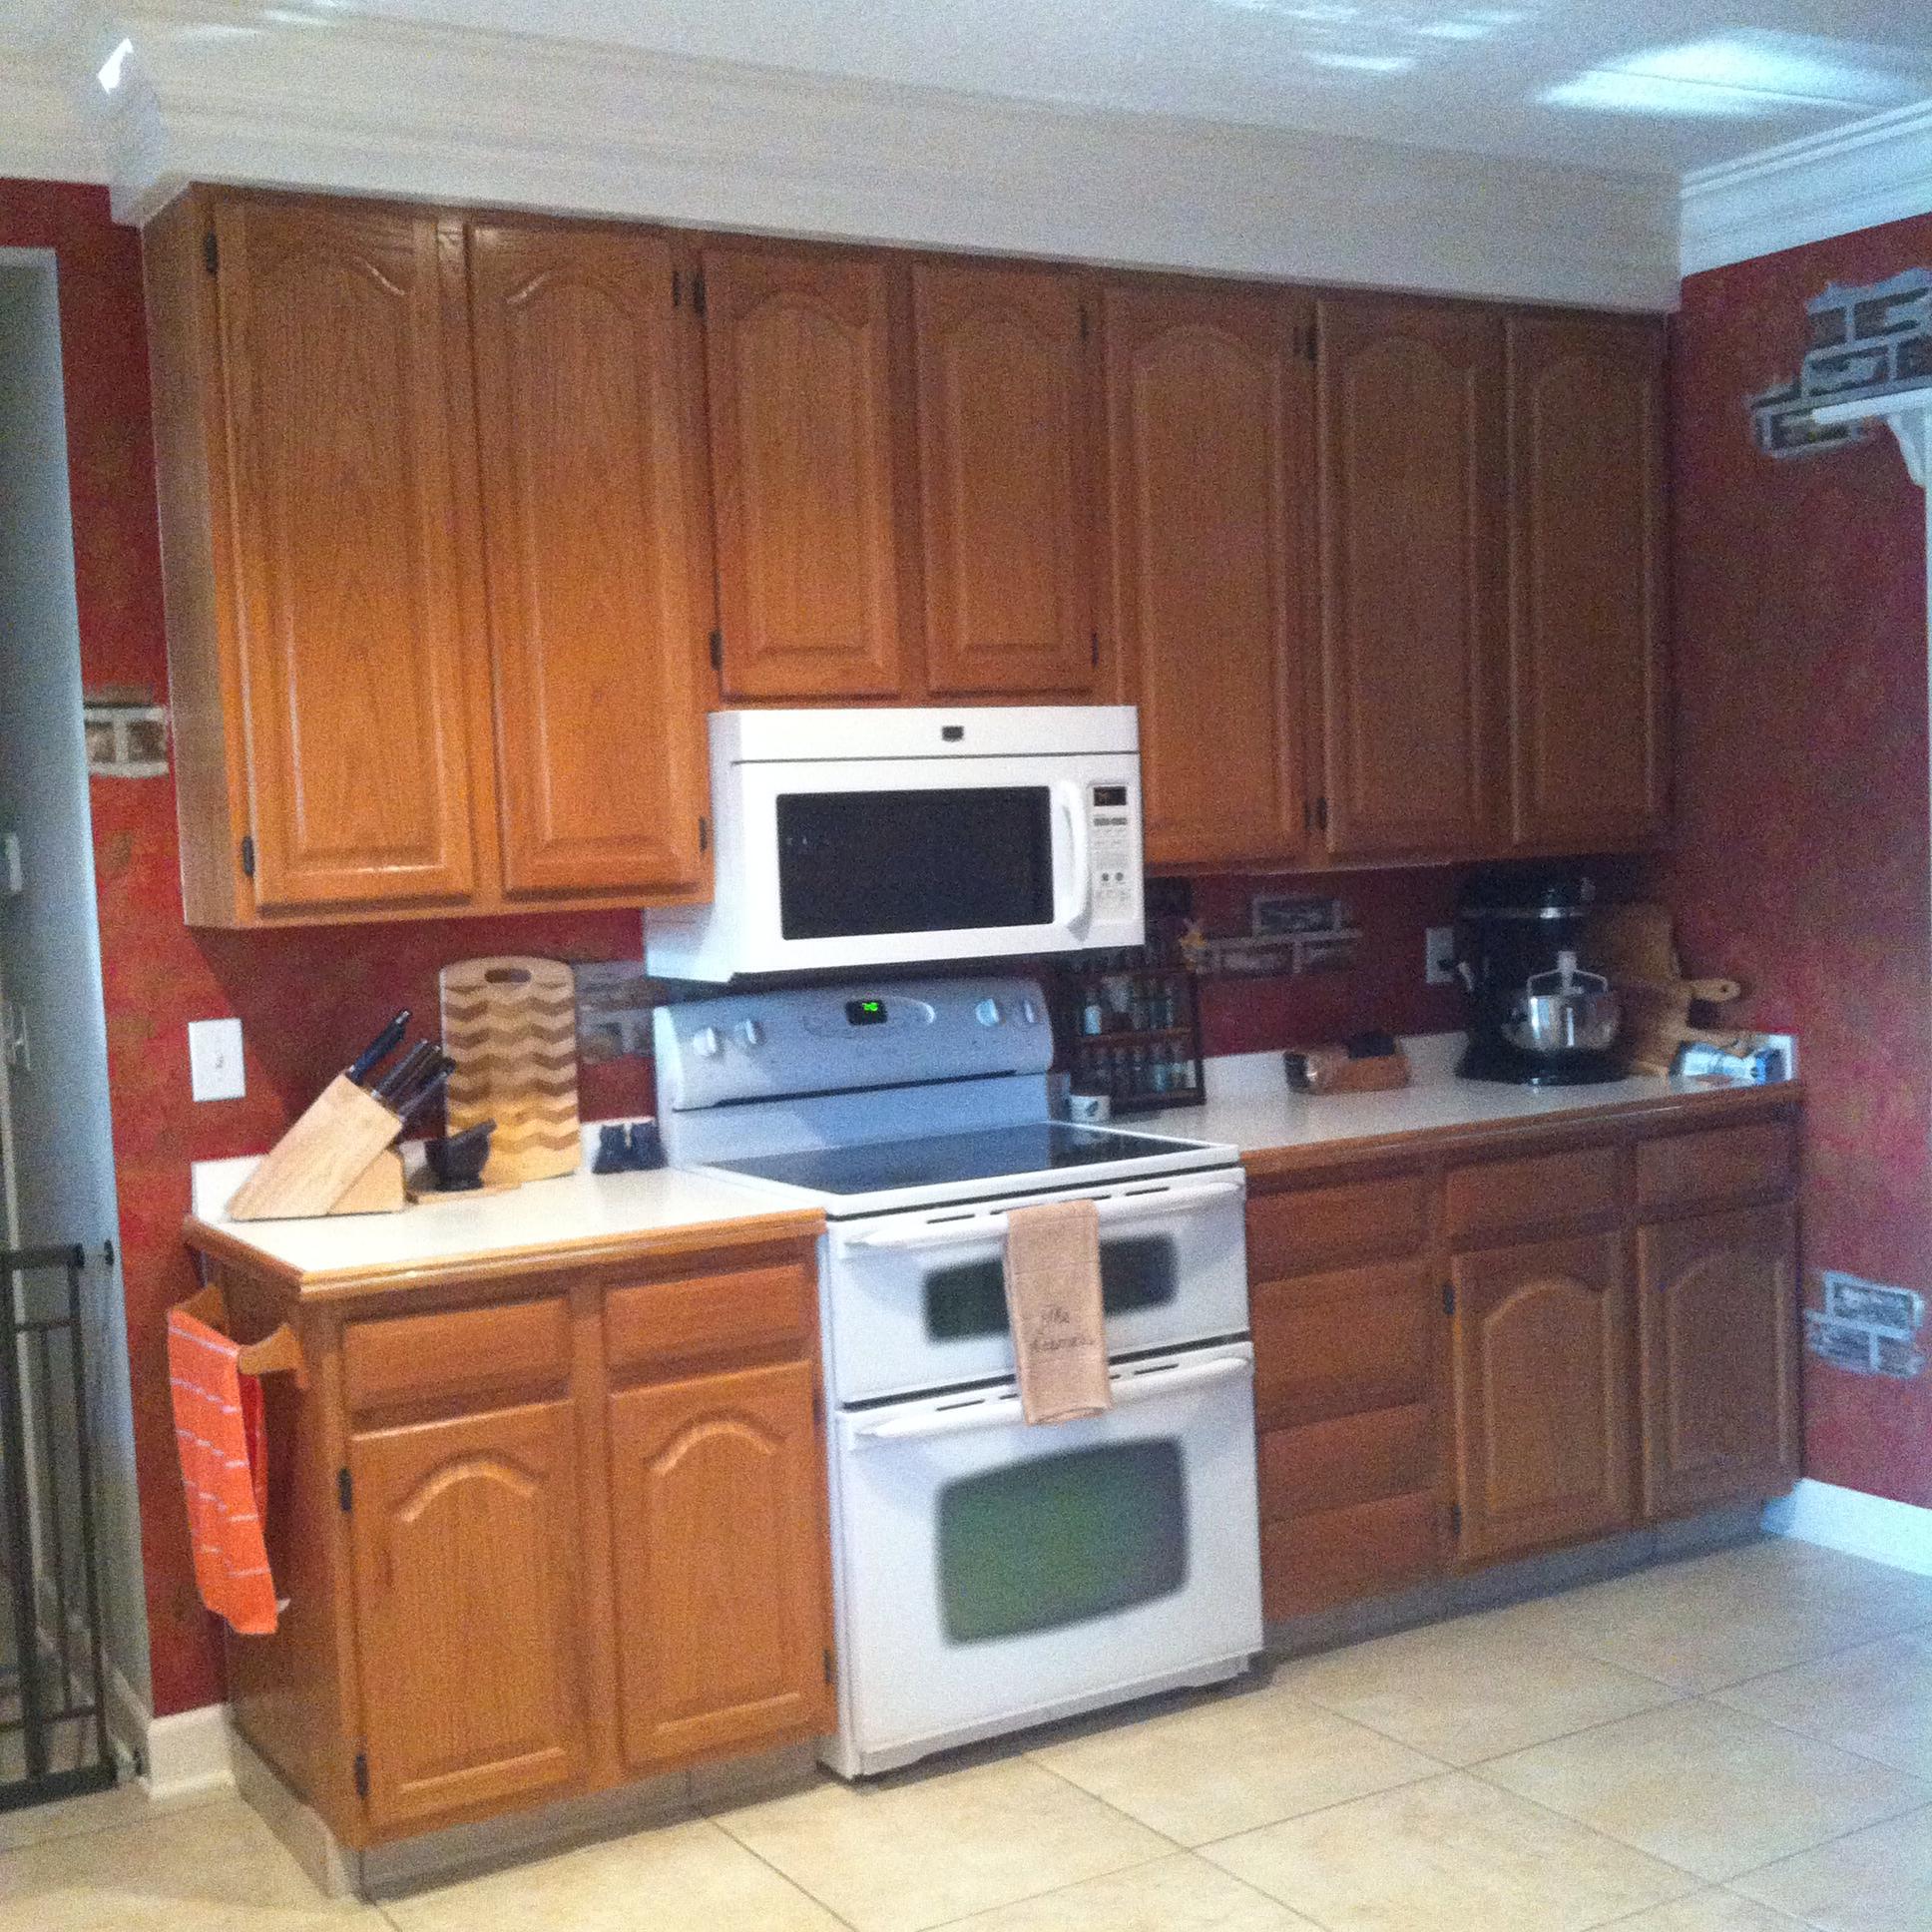
the cream color formica counter tops

12087866_10205478248891779_7030794072462890708_o

the light colored tile, the red paint, the gold sponge paint on top of the red paint and the painted on faux brick on top of the red paint.

12140113_10205478249651798_2512257362568208035_o

Don’t get me wrong, I LOVE the color red. I really do. But it was too much for the kitchen. It wasn’t my style and it made me not want to be in the kitchen.

I firmly believe that the most memorable family memories are made in the kitchen. Any conversation or story that I tell my kids from my childhood, always has us in the kitchen. So I was determined to turn this kitchen around.

I pinned, I googled and I browsed Home Depot. I knew what I wanted but I couldn’t get the husband (or the checkbook) to go for it, no matter how hard I tried. Deep down, I knew it was unrealistic to redo the entire kitchen so I opted to work with what I had. I still pinned and googled but this time I added a few key terms to help with my search…oak cabinets, white formica, white appliances. I wanted the internet to show me what color paint would work best with what I had because I knew I could get the husband on board with that and he would love it too! I could change the look without draining the bank account. I was determined to LOVE my kitchen again and a little paint could bring me that love…right??

Stayed tuned for Part II…

Easter Ain’t Over Til The Hambone Gets Crocked

20150407-184154.jpg

My favorite comfort food of all time…Crock Pot Split Pea Soup!! Both my mother and my father would make this anytime they had a hambone and it always made the house smell wonderful but did I ever eat it?? NO. It looked disgusting AND it had peas in it AND a giant ham bone. No thank you. Looking back, I really wish that I had tried it…at least once, so that I could have something to compare it to.

It’s always around the holidays when I feel homesick the most and it’s usually when I do best cooking. So, this Easter was no different from any other..gotta save the hambone for some home cooked soup. You know, making comfort food to comfort my heart, or at least try.

Split Pea Soup has got to be one the easiest soups to make and it brings great comfort to my heart and also to my belly. It makes a ton so get ready to share with family or friends or stick some in a ziploc bag and freeze it. It freezes great! I recommend freezing it in single portions. That way when the husband is out of town and you don’t want to cook but you are looking for a lil’ comfort…just take a bag out of the freezer and voila! Comfort food without any work.

20150407-184000.jpg

Rinse the peas and put in the crock pot first. Next, add the hambone. Add the potatoes, carrots, onion, salt and pepper. Fill with water, leaving about 1/2 inch at the top. Cover and set on low for 10 hours.

After 10 hours, your soup will look like this:

20150407-184055.jpg

Remove the hambone very gently.

20150407-184016.jpg

Stir the soup. The peas will lose their shape and the soup will thicken. If you want an even thicker soup, mash the potatoes with a fork…I love a thick pea soup!

20150407-184035.jpg

Shred the ham with a fork and add as much or as little back into the soup as you would like. I like just a bit but to my husbands bowl, I add a bunch!

20150407-184122.jpg

Enjoy! Happy Cooking!

And please let me know if you decide to try it. I would LOVE to hear your thoughts!

You can also find me on Pinterest & Facebook.

Love,

Mrs. Roemer 😉

xoxo

Crafty Kids & A Frugal Mom

20150301-141100.jpg

It’s no secret that I have passed on my love for crafting to my girls. The ask me every day if we can do some sort of craft whether it’s painting, cutting, coloring or glueing. They love it all!

Now that the two older girls have quite a list of friends, there is always a birthday we are celebrating. I got tired of buying birthday cards….actually that’s not true. I got tired of FORGETTING to buy the birthday card.  #mombrain I have a closet full of craft supplies and those times that I didn’t have a card, I would quickly make one on our way out the door. Then the light bulb went off…why not have the kids make them!! So we starting making cards for all occasions- Christmas, Thank You, Birthday, Mother’s Day, Father’s Day and this time Valentine’s Day. Valentine’s Day was fast approaching and I still didn’t get cards for the girls to handout at their parties. I was looking through our town’s newsletter and VOILA! There was a link to the cutest homemade valentine ever- a butterfly with a lollipop for the head and body. All you had to do was print, cut, decorate and stick a dum dum pop inside through the middle. Perfect! Or so I thought… 20150301-141031.jpg My printer was on the fritz (and still is…ugh) and I already told my oldest we were going to make them. You know those 4 year olds…they never forget a thing! So what’s a mom to do? Cut out the butterfly from the newsletter, trace them on card stock and cut out 40 of them (20 for each class). OMG. I was really wish I had a Cricut for that one!!

But it was totally worth it. The girls had a great time coloring and decorating all the butterflies. Even the 2year loved it! It kept them happy and content for at least an hour and a half. No whining, no complaining and no fighting! Score one for mom!

Next time, if we have to do that many, I have to start more than a few days early. We cut it pretty close this year. The 2 year old had all 20 of hers done in about 30 seconds but the 4 year old was really into decorating each one ever so carefully.

Check out the butterfly cards over at Skip To My Lou. They could be used for any occasion, not just Valentine’s Day and who doesn’t love artwork from kids with a bonus lollipop?! There are a bunch of great FREE printables and activities for the kids. If you stop by, tell Cindy I said hi! 🙂

Happy Crafting! Katie

P.S. Come visit me over on Facebook… Mrs. Roemer’s Nest 🙂

Crafty Kid Time

Sunday’s card making went so well, I stopped at Michael’s again and picked up some more supplies. I’m in the process of making some teacher gifts (another blog post to follow) and I needed some cards to go with the gifts. My 4yr old LOVES to craft and she is in LOVE with Baby Jesus (she thinks she will get to meet the “real” Baby Jesus on Christmas) so I thought this would be a perfect craft for her. I waited until the other girls went down for their nap and I let her do this one alone. She let me help every once in a while, but for the most part she did it all.

photo 3-2

Now these were slighter more expensive to make…$0.32 per card compared to $0.30 per card for the Christmas tree one. Hahaha! Again, it would cost more to mail these cards than it is to make them. LOVE IT!!

Here’s the breakdown…

  • cards with envelopes…$2.49
  • nativity scene foam stickers…$1.99

For a grand total of $4.48. The stickers only had a complete set of 7, so we decided to do two different cards to be able to get 14 cards. It took a bit to convince her that it would be ok if the wise men are on their own card. I told her they will follow the bright star of Bethlehem and find Baby Jesus. She gave that some serious thought and then gave me the nod of approval. Have I mentioned that I just love this age?

I now have a total of 39 Christmas cards and I only spent about $12. The kids had a blast creating cards to give out to friends and family and hopefully I’ve created some good family memories for them.

Love & Prayers,

Katie